

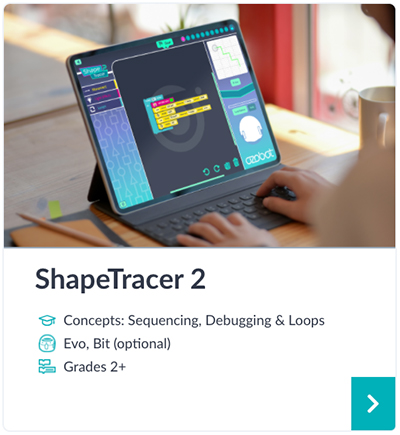
Interested in providing your students (or kids!) with meaningful computer science experiences without a robot? Check out ShapeTracer 2! This blog post will guide you through all 10 levels of ShapeTracer 2 with tips and tricks for teaching the content. By programming a virtual Ozobot through each level, students in grades 2 and up will be introduced to core computer science concepts like sequencing, debugging, and loops.
Before attempting ShapeTracer 2, be sure to complete ShapeTracer 1. ShapeTracer 1 is the perfect launching pad for introductory block-based coding, and ShapeTracer 2 expands on the concepts and skills that are introduced in ShapeTracer 1.
What’s the Difference between ShapeTracer 1 and ShapeTracer 2?
ShapeTracer 1 serves as an introductory block-based coding activity. It focuses on sequencing movement and lighting effects. ShapeTracer 2 takes it one step further by introducing the concepts of loops and nested loops. These sophisticated logic and programming skills are challenging for adults and students alike!
Where can I find ShapeTracer 2?
To use ShapeTracer, you’ll need a computer with a web browser or a tablet (iPad 3 or newer and Android tablets). Find it (along with other Ozobot learning games) at ozobot.com/create/games. Or, go to ozobot.com and:
- Select Create
- Select Games
- Select ShapeTracer 2
Getting Started
Now you’re ready to begin! Let’s jump right in. Give your students a general Overview:
ShapeTracer 2 is a block-based programming tool for students. They can program and code with no bot required. Here are some general tips and tricks:
- The Goals section gives directions for each level. Generally, the goal is to program the bot to trace the colored line shown in the Simulator by programming it with the OzoBlockly blocks in the left panel.
- The Simulator is in the upper right panel.
- There are 10 levels/goals total.
- Students will receive feedback on whether their program was:
- correct,
- correct with the opportunity to make their program more efficient by using fewer blocks,
- or incorrect
- Once all 10 stages are completed, students can unlock a printable activity.
- Robots are not needed, but if students have access to Ozobots, they can use the flash loading feature.
- All code blocks needed for each level are in the left panel.
- Any speed will work in the movement blocks.
Level 1 Tips and Tricks:

- Remind students to use a Light Effects block and “set light color” to match the line in the Simulator before each movement.
- Explain to students that each square in the grid represents 1 step for Ozobot.
- The large, darker squares represent 5 steps.
- Orientation of the bot: round shape represents the back wheel hubs.
- Pose some guiding questions:
- How can you quickly tell how far the bot needs to move?
- Answer: If the dark gray grid lines represent 5 steps, double that would be 10 steps.
- How can you quickly tell how far the bot needs to move?
- Explain to students:
- In ShapeTracer 1, we programmed sequences. In ShapeTracer 2, we’ve “leveled up” and now have the ability to utilize loops.
- Loops can be utilized to repeat code. Anything programmed in a loop will repeat. Ask students to notice if the bot needs to move in a specific pattern. The pattern can be programmed into the loop.
Level 2 Tips and Tricks:

- Make Math connections:
- Geometry: the code in the loop represents each side of a square.
- Ask: How many sides does a square have? How many times does our loop need to repeat?
- Geometry: the code in the loop represents each side of a square.
- Shortcut: Right click on any block and click duplicate to easily make copies of code in your workspace.
Level 3 Tips and Tricks:

- Encourage testing and debugging.
- Make a Math connection:
- Geometry connection: this shape is a slightly-rotated square
- Remind students to set light color before coding each movement.
- Shortcut: Right click on any block and click duplicate to easily make copies of code in your workspace.
Level 4 Tips and Tricks:

- Introduce a new coding concept: nested loops
- Explain that there is a pattern within a pattern. Ask students to identify the two patterns
- The two patterns include:
- The up-down, up-down line that the bot travels
- The “repeat 3 times” loop represents this pattern
- The bot traveling the yellow line on top, and then traveling the purple line underneath.
- The “repeat 2 times” loop represents this pattern
- The up-down, up-down line that the bot travels
- Remind students to set light color before coding each movement.
- Testing is your friend! Encourage students to test each segment so they reduce debugging later.
Level 5 Tips and Tricks:

- Encourage students to identify where they can use a loop
- Probe with: Where do you see a pattern? Can we program that section with a loop?
- Explain to students that the first red line segment and the last blue line segment are not part of the pattern, and therefore, are not included in the loop.
Level 6 Tips and Tricks:

- Make a Math connection: logical reasoning and geometry:
- There are multiple solutions, but encourage students to use the least number of blocks.
- Hint: Turns require a movement block, so utilize the bot’s directionality to your advantage!
- Ask students, “Why should we trace the green square before the red lines?”
- Explain that because the bot is already pointed in the direction of the green square’s side, we can use that to our advantage.
- Having the bot turn would take an extra block.
Level 7 Tips and Tricks:

- Make a Math Connection: Geometry
- Ask students: How many sides does this shape have? If this shape has 8 sides, why is the loop only repeating 4 times?
- The loop only repeats 4 times, because the pattern of “Blue-Red” repeats 4 times
- Ask students: How many sides does this shape have? If this shape has 8 sides, why is the loop only repeating 4 times?
Level 8 Tips and Tricks:

- Make Math connections:
- Logic:
- Ask students: What is the shortest path to completion? How can we effectively utilize the ‘backwards’ direction?
- Utilizing “backwards” eliminates the need to have the bot rotate later in the code, and will be the most efficient way to trace the shape.
Level 9 Tips and Tricks:

- Make a Math connection:
- Logic:
- Ask students: Why would we choose to use “backwards” in this puzzle?
- Using “backwards” eliminates the need to rotate, and therefore, is the most efficient way to program the bot to trace the shape.
- Ask students: Why would we choose to use “backwards” in this puzzle?
- Logic:
Level 10 Tips and Tricks:

- Make a Math connection: Geometry
- The shape is a square. The “repeat” loop will include the code for each side of the square.
- Helpful Hint:
- To trace black, turn the top light off
Great! You’ve completed all steps in ShapeTracer 2! Now, how can you use this tool with your students? If you are teaching in a virtual classroom, we have two recommended pathways:
- Step-by-step I do, we do, you do model:
- Model each step for the students, and have them follow along on their devices. Once they understand the content, release them to complete stages on their own.
- Assign ShapeTracer 2 as independent practice for students:
Come back and discuss
- “What was easy?”
- “What was hard? What strategies did you use to figure out the issue?”
- “How did you solve the challenges?”
- “Was there one level where you tried multiple solutions?”
- Have students screenshot different solutions and share their thinking.
Have fun with ShapeTracer 2, and come back to check out posts about OzoTown. They’re coming soon!